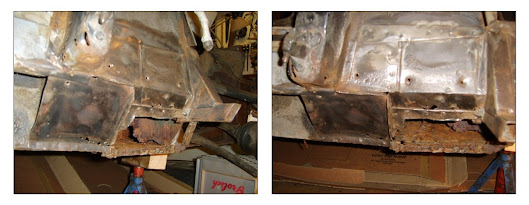
What Lies Beneath ...
This was the first area I decided to work on, primarily because it was the easiest place to gain access to in what had become a cluttered work-space. The offside sill followed naturally and so I decided to simply work my way around the car in a clockwise direction. I bought a 'cheap' MIG welder from eBay (my first and most regretted mistake), learnt to weld over a period of weeks, bought two large sheets of steel, 0.8mm and 1.0mm and set to with gusto.
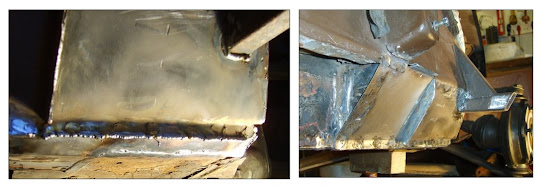
Cutting out old steel, making cardboard replicas of the pieces removed and then forming the new steel insert is not particularly hard although the inner strengthening plates took some dexterity. It takes patience but with a good vice, some good hammers, an array of dollies and some heavy duty angle-iron sections, it's a skill that builds easily.
From the start, I decided that I would finish off all seams with a full weld rather than rely on more traditional plug/spot welding. It added a little more time to each repair but with care to keep runs small and heat limited, I got very little distortion through the project with the benefit of moisture-tight seams. I'm sure it is a philosophy most restorers would choose not to use but I have no regrets and it worked for me.
This was my first section for repair and looking back, was a complicated and difficult initiation. However, I found that forming metal was both cathartic and satisfying; it took time and thought but in some ways, this became an important part of the journey. As time wasn't particularly pressing, this being a project I could just dip into, I resolved to use pattern parts only where forming them by hand was too difficult.
Following repairs, each section was painted with Hammerite Brown undercoat, simply as a rust preventative until the car became ready for professional spraying. In the 13 or so years this project has taken, no rust ever appeared and it was easy to rub down and flat as a base prior to final surface preparation.


No comments:
Post a Comment